Free Four Step Watercolor Lessons
Painting your own watercolor cards will be easy if you follow these free four step watercolor lessons. The steps are easy to follow and the results will delight both you and your recipients.
I have taught many people of all age groups and varying degrees of experience. It is always fun and mutually satisfying to see the results.
The steps are small to get you started and let you understand the basic rules for using watercolors but as you practice and gain confidence, you will add your own bigger steps. You will realize that the medium is very flexible and you will learn to experiment with it.
I continue to learn new techniques that I create myself and from others.
After the lessons, I have included the items that you might want to have to get started. The large palette is not necessary at this time, just get the colors that I refer to in the lessons.
When you feel comfortable with these techniques, take a look at my video lessons and have more fun!
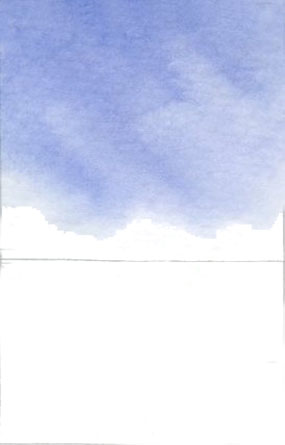
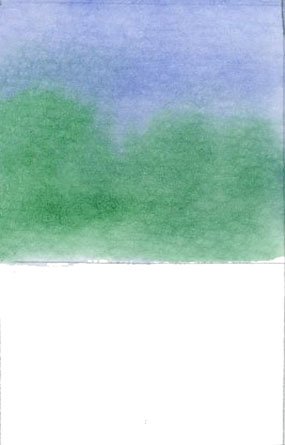
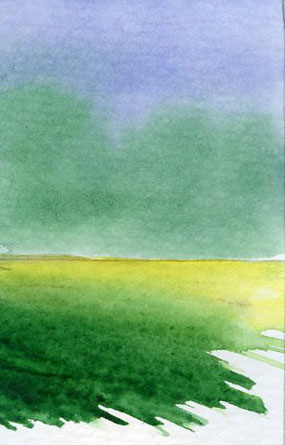
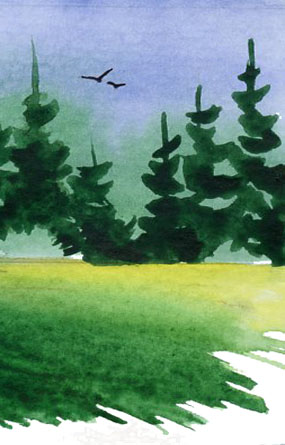
Landscapes
Draw a horizon line and wet paper above line. Drop blue at the top and tilt paper back and forth.
When dry, wet above the line again and add a dark green mixture at the bottom.
Let it bleed up to give distance.
Add yellow next to trees.
While wet, paint greens into yellow.
Let dry.
Have fun, paint focus trees. Leave some light green at the base to suggest shrubs.
Add narrow line at base of shrubs.
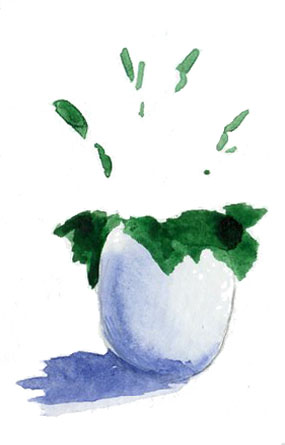
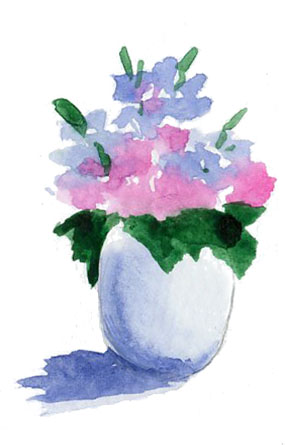
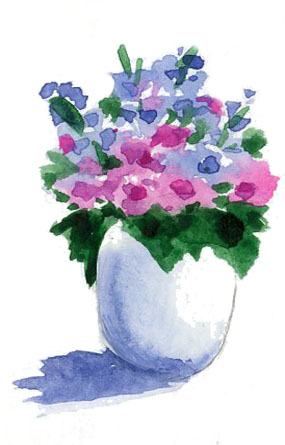
Floral Still Life
Sketch an oval vase off center. Wash a shadow down one side.
Soften edges.
Lay in green shapes to suggest lower leaves and upper stems.
Add shadow.
When dry, add flower shapes and colors.
Keep the brush marks simple.
When dry, darken some areas like the flower centers and add more leaves if needed and shadow on the vase.

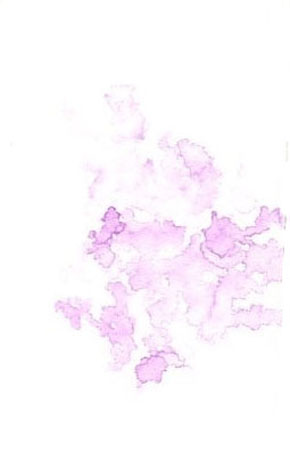
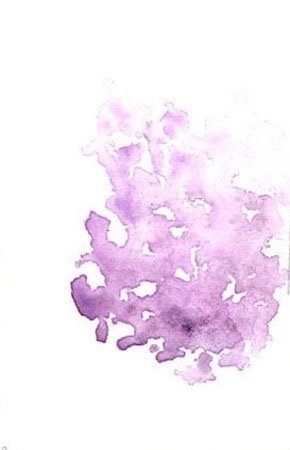
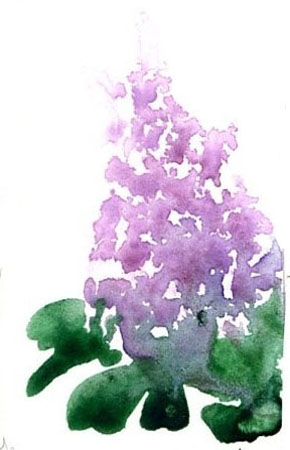
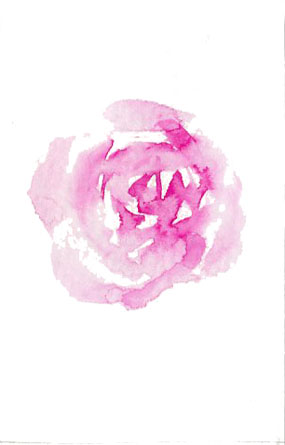
Lilacs
This is a lovely painting that does not require any drawing. Keep looking at the example while you paint yours. Steps 1, 2 and 3 happen quickly before the water dries. Use a fine spray squirt bottle, 140# watercolor paper, a small round watercolor brush and a few tissues to shape the lilac. Make your rectangle 2" x 3" or 3" x 5", keeping it small will allow you to make several and you will get more confident with practice.
The secret of good painting?
PRACTICE, PRACTICE, PRACTICE!
Spray paper lightly with water. Drop lilac paint, dab up excess wet leaving lilac shape.
While wet, drop in darker lilac and purple at the base of the flower. It will blend easily.
Still wet, drop touches of green at the base in rough leaf shapes.
When dry, paint a few leaf veins and some purple dots on flowers if needed.

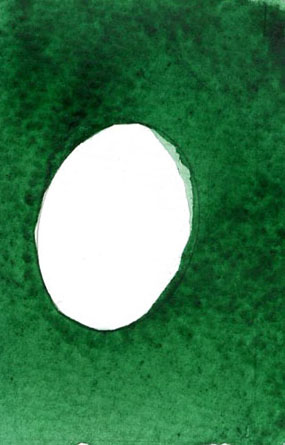
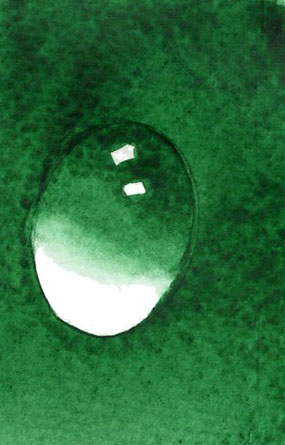
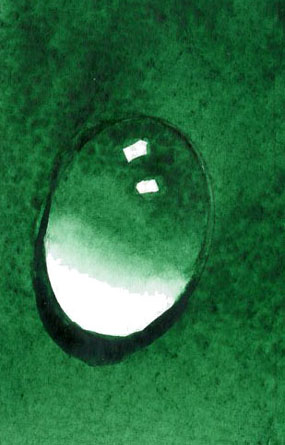
Dew Drops
Draw an oval.
Paint around the oval with a solid color. Let it dry.
Using the same color, paint the top half of the oval leaving a highlight. Blend the edge to soften it, leave bottom white.
Final step makes the shadow go 3D. Paint a shadow under the white edge.

EvergreenTrees
Load a Miracle Wedge brush with Hooker's Green. Start with a vertical slash, then make a few more diagonal slashes, thick or thin.
Keep practicing this calligraphy, you'll get it.
Focus trees.
Solid wall of trees. Leave small white spaces in the body of green. Start this with the top of the trees. Work down, add dark at the base of the trees. Add a slash of yellow while wet.


A Simple Colorful Background Using Salt
Spritz water on paper.
Then quickly......
Drop pigment into water droplets. Let colors mingle. Don't paint them together.
While wet, sprinkle salt. Let dry. Rub salt off.
Now apply a simple image using darker paint.


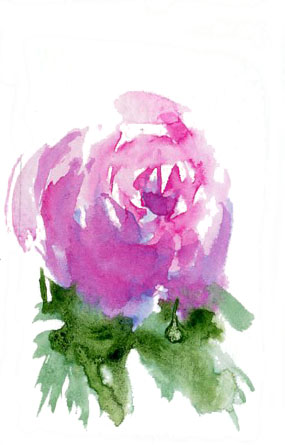
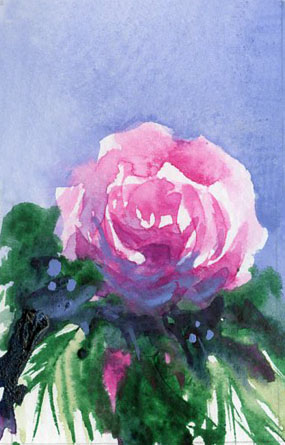
A Full Rose
Paint a diamond shape. Now paint a few curved shapes around the sides and below the diamond.
While the paint is still wet, clean your brush and swipe around the pigment with more curved stokes and soften the edges. Keep some white spaces.
Drop in some delicate blues towards the bottom of the rose while the soft edges are still wet so that the shadow color bleeds up. Add green in leaf shapes to the wet blue.
Finish by selecting a background color and filling in above the rose. Leave whites at the top of the rose to show light. Add detail to the leaves, darken under the rose.

Dramatic Alder Painting
Pencil in a line drawing of tree trunks with branches.
Lay a shadow down one side of the trees. You can be sloppy as the areas outside the trees will be dark.
Mix yellow ochre and indigo and place it in lateral patches across the trees.
Mix a big puddle of indigo. Wet with lots of pigment and fill in all the negative spaces.


A Bright Autumn Leaf
The lesson here is to enjoy the color marrying on the paper. Let the wet colors seep into each other, don't brush them in.
Load your brush with lots of yellow. Lay it on in one of the top points in the leaf. Do the same with the other two points using wet red and orange.
Let the colors mingle.
While wet, add greens and blue greens to the bottom third of the leaf.
The entire leaf should be wet. Pull the stem out of the bottom puddle.
Take a thumb tack and cut into the paper along the leaf veins. The paint will darken in the scored lines.


A Palm Sunset Landscape
Draw a low horizon line. Hold paper upside down and wash yellow from the line down.
While wet, add pink or orange letting colors merge. Keep holding paper up letting wet paint fall to the top.
While wet, add blue to the top of the sky. Let the pink merge into the blue.
When dry, use a rake, fan or comb brush and paint the palm and grasses using indigo.
These brushes make the grasses and palm shapes easily with just a little practice.


Bricks
Paint the area with a mix of earth colors. Let colors settle randomly.
Draw in the brick shapes when the wash has dried.
Paint every brick. Vary the color slightly. Let dry.
Now paint the shadow side and under each brick with indigo on a fine brush.
Drag an almost dry brush across the bricks for texture.


Summer Oak
Mix yellow and green on a round brush. Dry the brush off so when the brush is rolled flat on the paper, the paint only covers some of the paper.
Leave open areas.
Lay this blotchy paint in an oval with a flat bottom.
Darken the lower area of the tree.
Now turn the brush onto its point and dot on several bunches of leaves scattered over the tree.
Use a fine brush or pen to put limbs in the open areas that you saved.
Mix sienna and yellow ochre. Put a slant under the tree. While wet, put indigo into the paint under the tree to suggest shadow.
Lightly, put yellow over the top to show sunlight.


Topiary
Sketch the topiary and the pot.
Paint the topiary light yellow and the pot in three colors, yellow, red brown (Sienna) and Ultramarine blue all wet and let the pot colors blend.
Paint the tree trunk. Add medium green to the topiary leaving some yellow untouched to state where the light is coming from.
Paint dark green on the shadow curve of the topiary.
Drop a touch of medium green onto the grass in the pot and brush a mauve shadow under the pot.
With a fine pen, twirl a vine up the trunk.
Soften green and yellow with a fine damp brush.


Credit Card Rocks
Wash a blue grey sky over your paper.
While it's wet, drop in greens and a mix of Sienna,
indigo,
yellow ochre and purple in the lower section. This should be dripping wet.
Count 30 seconds and start scraping the rock sections with a credit card.
Add detail, trees above the rocks. Scrape tree trunks while the trees are still wet.
Enhance the rocks by painting crevices darker and adding fissures.


A Cottage in the Woods
Pencil in a basic house shape then paint the two vertical sides. Make one side darker than the other.
Paint a blue sky above clouds as shown.. The clouds, or unpainted white paper, make a dramatic edge to the dark green trees. Be sure to make the top quarter of the paper blue.
Mix a puddle of dark green and paint the woods behind the cabin.
This should be done quickly so that you can drop darker colors into the lower areas while the paint is wet, which suggests dense foliage. Have fun with this section.
Finish the painting with a dramatic slash of yellow sun lit grass.
Have plenty of wet pigment on your brush. While it is wet, pick up green and bring it to the bottom of the paper. When this dries add tall grasses with a darker green (I add blue and brown) using a fan brush.


A Lace Curtained Window.
Sketch the window and ledge and flower pot.
Loosely paint the shadows on the curtains, under the sill and on the pot. Make lateral marks using indigo to define the edge of the lace curtains.
Fill in the center with indigo leaving an edge to the lace. Paint three dots with indigo down the edges of the curtains.
Paint a wash around the window. Drop in salt while wet to resemble stucco. Paint the flowers and, if necessary, sharpen the shadow in the folds and under the bottom sill.


A Plump Tomato
Sketch a tomato.
Wet the tomato. Drop in yellow, then cadmium orange. Get a strong tomato color.
While wet, drop in dark violet/purple at the bottom of the tomato. Rotate the paper to blend in the shadow color. Quickly lift the highlights out while still wet.
Paint the stem leave yellow, not too wet. Drop in dark greens and blend.


A Boulder
Lightly sketch the rock.
Paint the rock from top to bottom with yellow ochre, Sienna and ultramarine.
Lift some highlights.
When dry, paint fissures from side to side.
Now paint the shadow. It sets the heavy rock down onto the ground.


Recommended items to get you started


